
Apache JMeter is a server testing tool that simulates the behaviour of users on your sites. It comes in handy when you want to test a site ahead of an event that will push traffic up sharply (an e-commerce site during the sales, for instance). It is an open-source tool built by the Apache Foundation.
A first run with JMeter
I am far from a JMeter and load testing expert, so I will walk you step by step through a first, basic run of Apache JMeter and through what I have understood of it. Do leave a message if you have questions or remarks. We start by right-clicking on Test Plan -> Threads (Users) -> Thread Group to add a thread group, which gives you the following on screen.
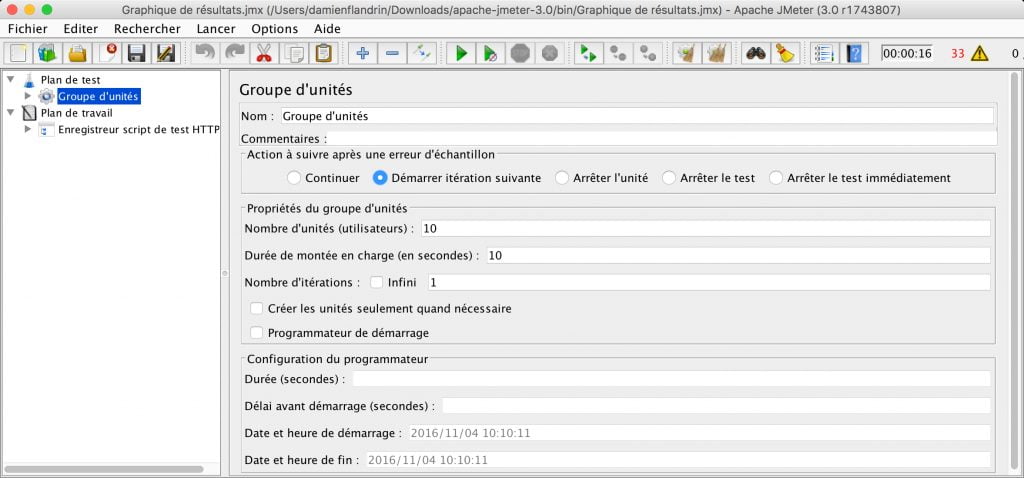
Action to be taken after a sampler error
This is what happens if an error occurs during your test: continue, start the next iteration, stop the thread or stop the test, and so on. By default we keep “Start Next Thread Loop”, which means it runs your steps again from the beginning.
Thread properties
Next come the properties of your thread group: the number of threads (which is the number of users) that will connect to your site, then the ramp-up period, which is the number of seconds those users are spread over. With 100 users and a ramp-up period of 10 seconds, 10 users a second will connect to my site. Finally there is the loop count, the number of times each thread (user) repeats the scenario: set it to 2 and a single thread runs the scenario twice.
Scheduler configuration
You will have worked this one out already: it sets a delay or a date for your test to start. Nothing complicated so far.
Setting defaults for our HTTP requests
For that, go to Test Plan -> Thread Group -> Config Element -> HTTP Request Defaults. It is not compulsory, but it lets you set a domain name once instead of writing it out again for every request you add to the thread group. In this example I used my blog.
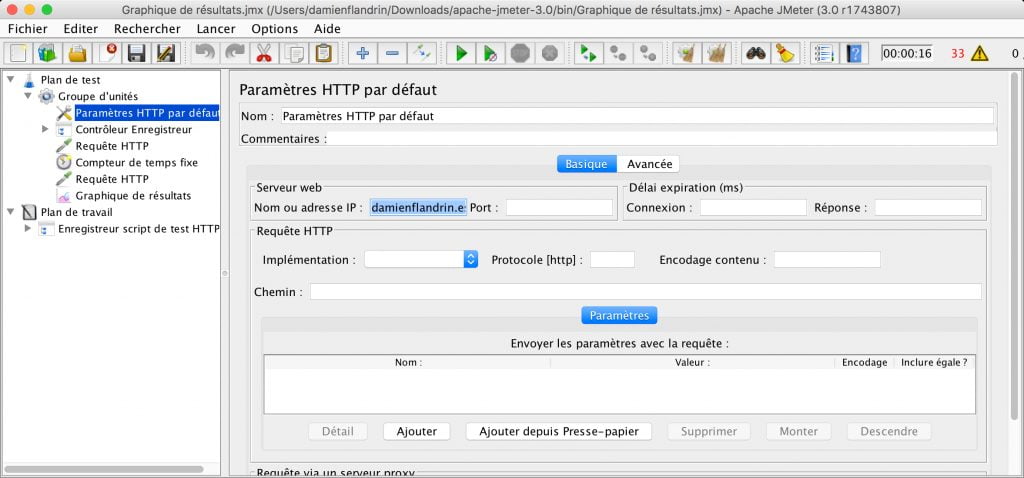
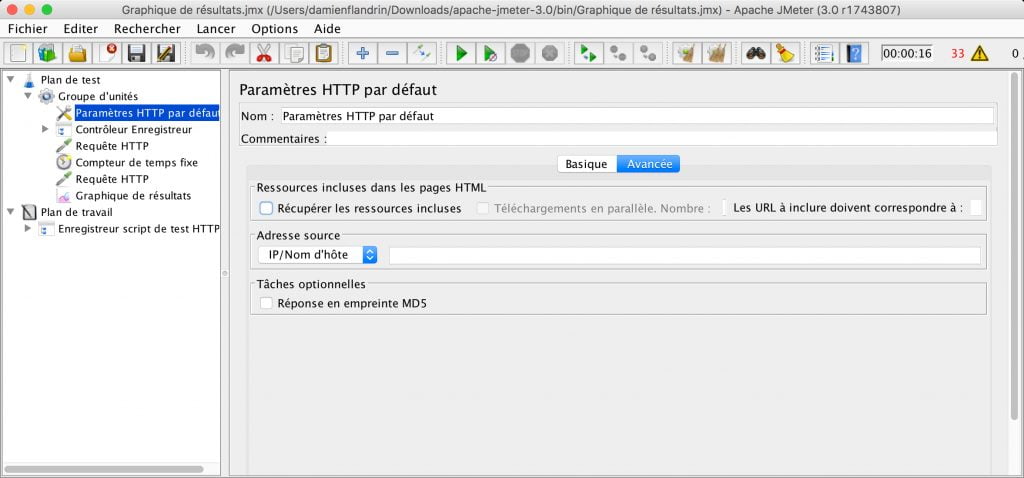
Note that JMeter does not fetch your assets during the test (CSS, JS, images and so on). To include them, go to Advanced and tick Retrieve All Embedded Resources. Be aware that your test will then take a lot longer to run.
Adding an HTTP request
You can now add an HTTP request with Test Plan -> Thread Group -> Sampler -> HTTP Request. There is a lot of information on screen here too, but take the time to read it and it falls into place quickly. In the path field of your request, enter a relative path, provided you have set your site in the HTTP Request Defaults.
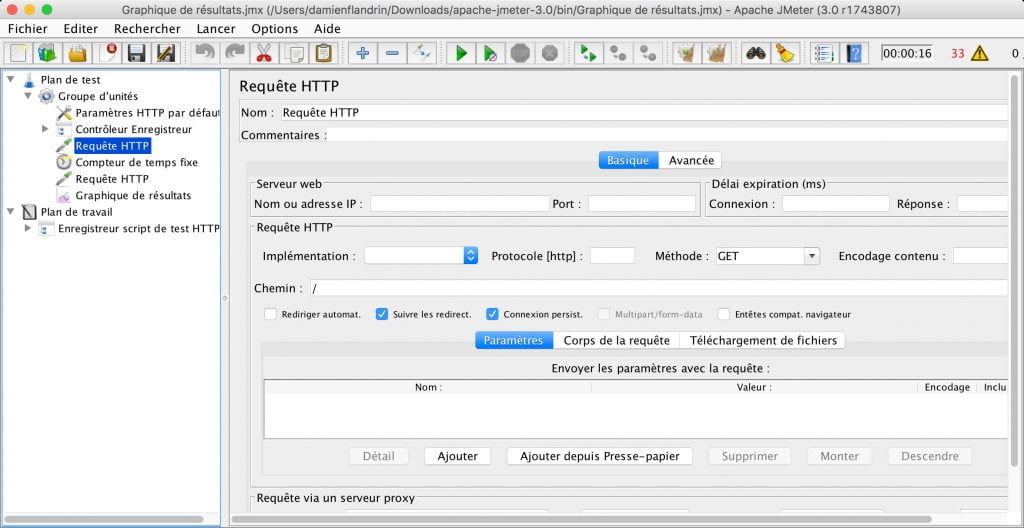
The constant timer simply sets a pause during which your fictional user waits (a real visitor does, after all, spend more than one second on a page).
Recording a scenario automatically with a proxy
You can record a scenario and replay it by setting JMeter up to capture what you do on a site and play it back as a test, which saves you writing a scenario by hand.
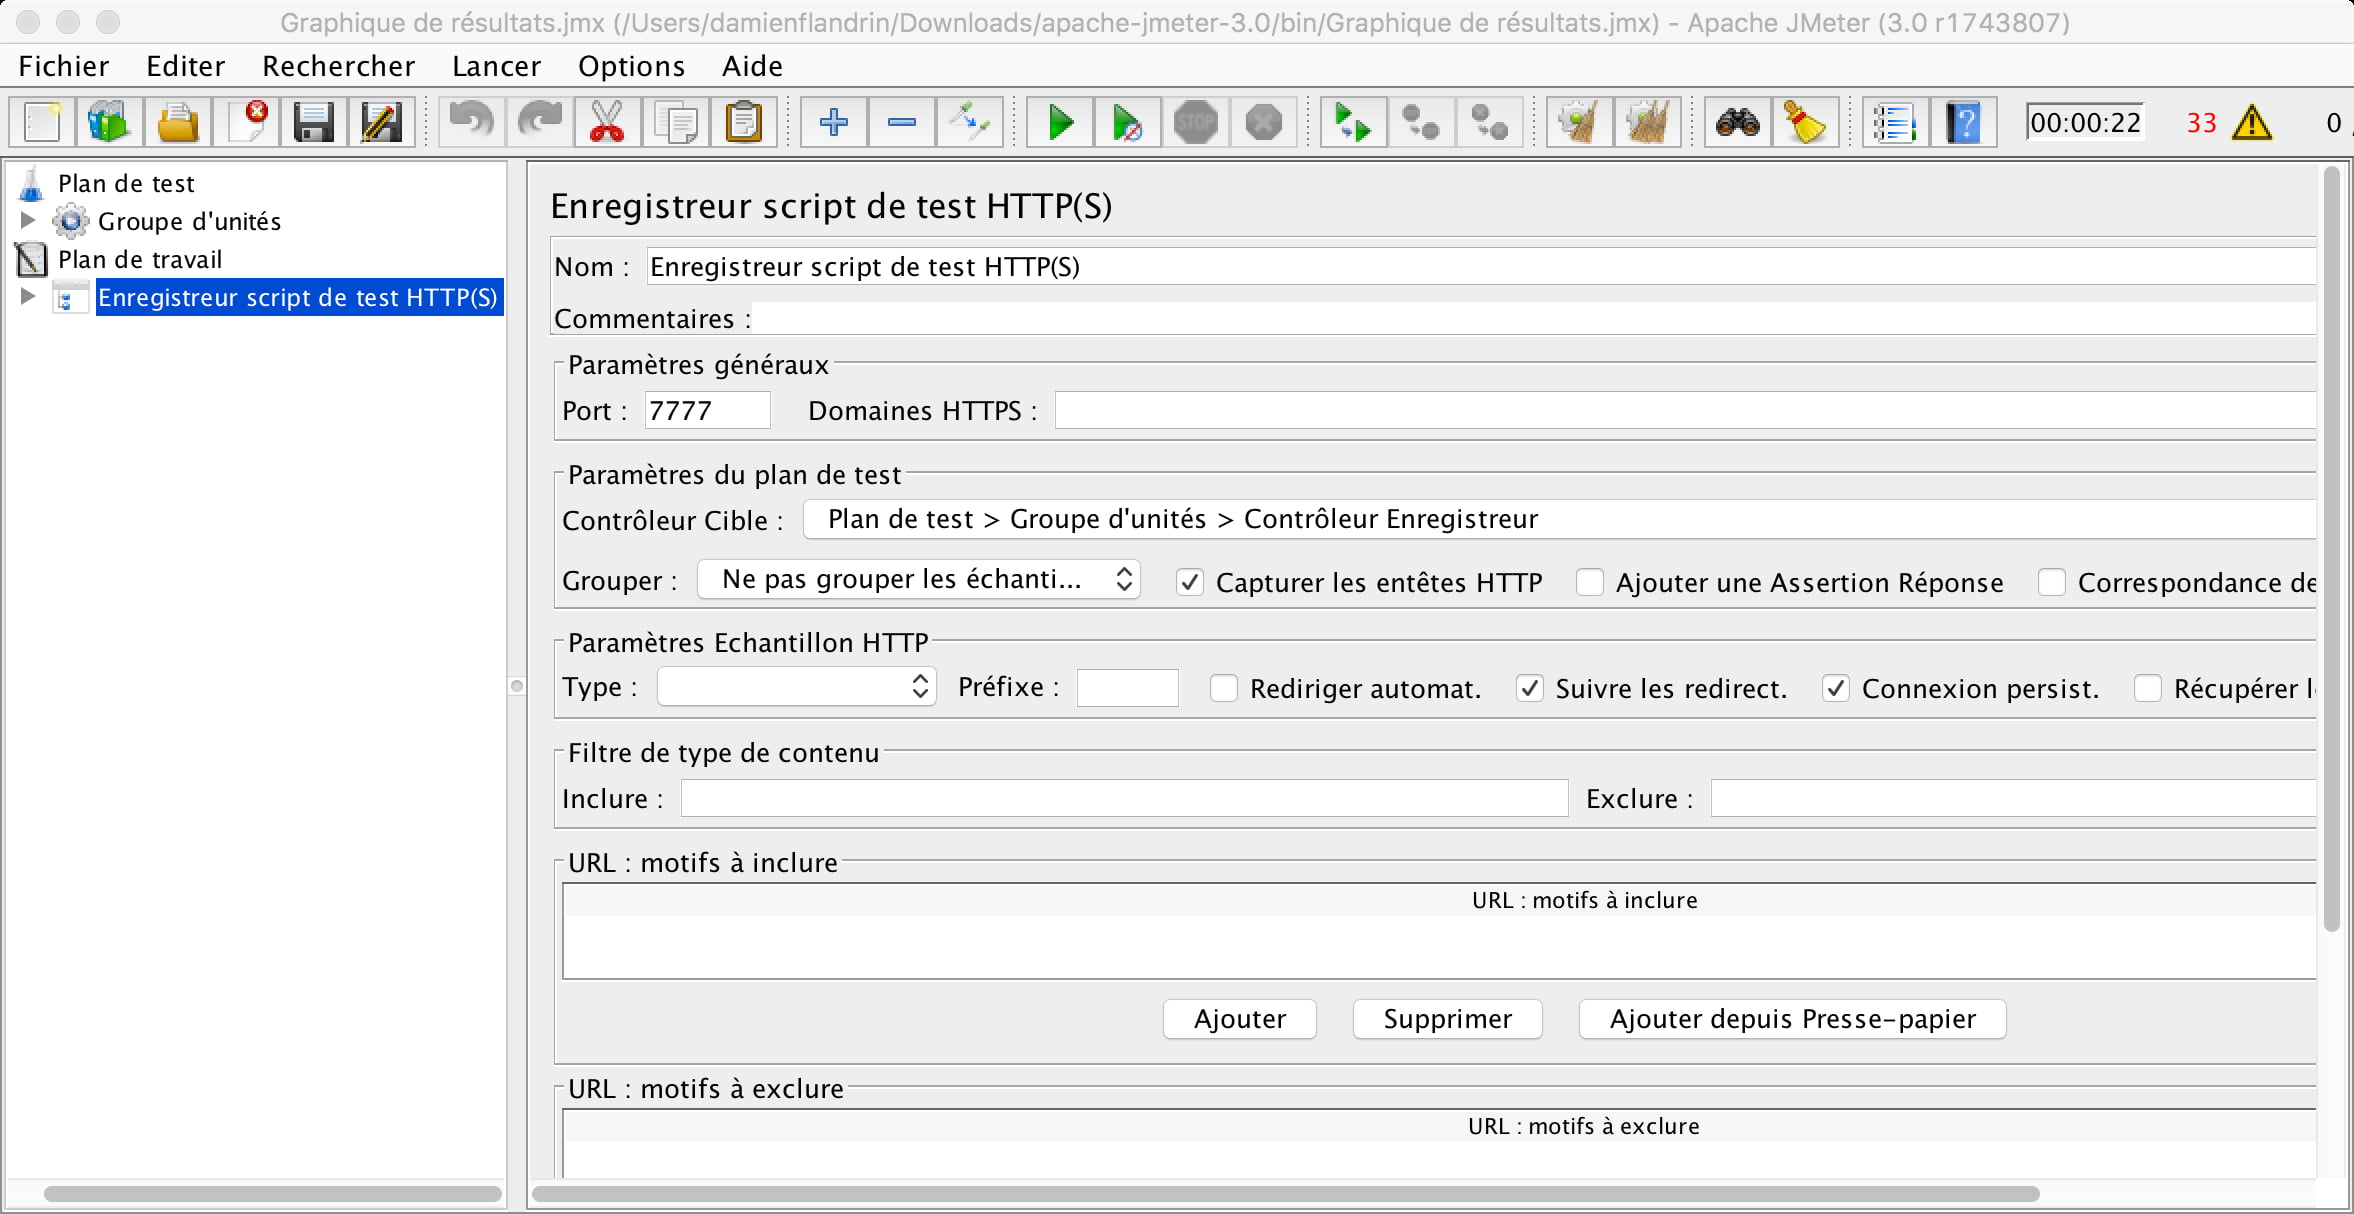
To do that, set JMeter up as a proxy with WorkBench -> Non-Test Elements -> HTTP(S) Test Script Recorder. Remember to start the recorder and to point your web browser at that proxy in its settings.

Then, still in the workbench, add a Listener -> View Results Tree to display the data and analyse your tests.
Conclusion
I came across Apache JMeter on a course, and I found it a very interesting way to test web applications against the server and to see whether some requests put too much load on it. Be aware that, for tests closer to real conditions, you need several servers with a JMeter agent installed on each, so you can drive them remotely and simulate visitors on your site from several places: the results are far more interesting to analyse and much closer to reality. JMeter is a very complete tool, and if I get the chance I plan to write a longer article about it.
···