An online chat is one of those very popular applications: several people talking to each other in real time over the internet. This tutorial shows how to build one in JavaScript, using the WebSockets API and adding CSS and HTML to make the interface pleasant.
Before you start, install NodeJS on your computer
Node.js is essential here: it is a JavaScript runtime that lets you run JavaScript code on the server. In this tutorial on building an online chat in JavaScript, we use the WebSockets API, which is only available server side. Node.js is what lets us create a WebSocket server and handle the connections and the real-time exchanges between the various clients.
So you need to install Node.js on your computer before following this tutorial. You can download the Node.js installer from the official site (https://nodejs.org/) and follow the on-screen instructions. Once it is installed, you should be able to run JavaScript server side with the “node” command in your terminal.
Install the ws package with npm
Install the “ws” module with npm (Node Package Manager). Open your terminal and type the following command:
npm install wsChat in JavaScript
An online chat is one of those very popular applications: several people talking to each other in real time over the internet. This tutorial shows how to build one in JavaScript, using the WebSockets API and adding CSS and HTML to make the interface pleasant.
HTML code
Create an HTML page with a form to type a message and an element to display the messages. You can use the following code:
index.html
<!DOCTYPE html>
<html>
  <head>
    <title>Chat en ligne</title>
    <link rel="stylesheet" href="http://style.css">
  </head>
  <body>
    <div id="chat">
      <div id="messages">
        <!-- Les messages seront affichés ici -->
      </div>
      <form id="formulaire">
        <input type="text" id="message" placeholder="Entrez votre message ici">
        <button type="submit">Envoyer</button>
      </form>
    </div>
  </body>
</html>
CSS code
Add some CSS to improve the interface of your online chat. You can use the following code as a starting point:
style.css
#chat {
    width: 500px;
    margin: 0 auto;
    font-family: sans-serif;
}

#messages {
    border: 1px solid #ccc;
    height: 300px;
    overflow-y: scroll;
    padding: 10px;
}

#formulaire {
    padding: 10px;
    text-align: center;
}

#formulaire input[type="text"] {
    border: 1px solid #ccc;
    border-radius: 3px;
    padding: 8px;
    width: 80%;
}

#formulaire button[type="submit"] {
    border: none;
    border-radius: 3px;
    padding: 8px;
    background-color: #4caf50;
    color: #fff;
}
Server-side JavaScript code
Create a WebSocket server with Node.js and the “ws” module. You can use the following code for the server:
server.js
const WebSocket = require('ws');

const wss = new WebSocket.Server({ port: 9999 });

wss.on('connection', function connection(ws) {
  ws.on('message', function incoming(message) {
    console.log('received: %s', message);
  });

ws.send('Bienvenue sur le chat Gekkode!');
});

console.log('Server started on port 9999');
To start the NodeJS server, type the following line in the console, from the folder that holds your project and the server.js file
server.js
node server.jsIf it worked, you should see “Server started on port 9999”. We have not finished writing the server code, and we will come back to improve it later in the tutorial.
In the meantime, let us head over to the front end.
Front-end JavaScript code
Connect your HTML page to the WebSocket server using the JavaScript WebSocket object. You can use the following code to get started:
script.js
const socket = new WebSocket('ws://localhost:9999');

socket.onopen = function() {
    console.log('Connecté au serveur WebSocket');
};

socket.onmessage = function(event) {
    const message = document.createElement('div');
    message.textContent = event.data;
    document.getElementById('messages').appendChild(message);
};
Send the messages typed by the user to the WebSocket server with the “send” method of the WebSocket object. You can use the following code to get started:
script.js
document.getElementById('formulaire').addEventListener('submit', function(event) {
  event.preventDefault();
  const message = document.getElementById('message').value;
  socket.send(message);
  document.getElementById('message').value = '';
});
How to share the chat messages with connected users
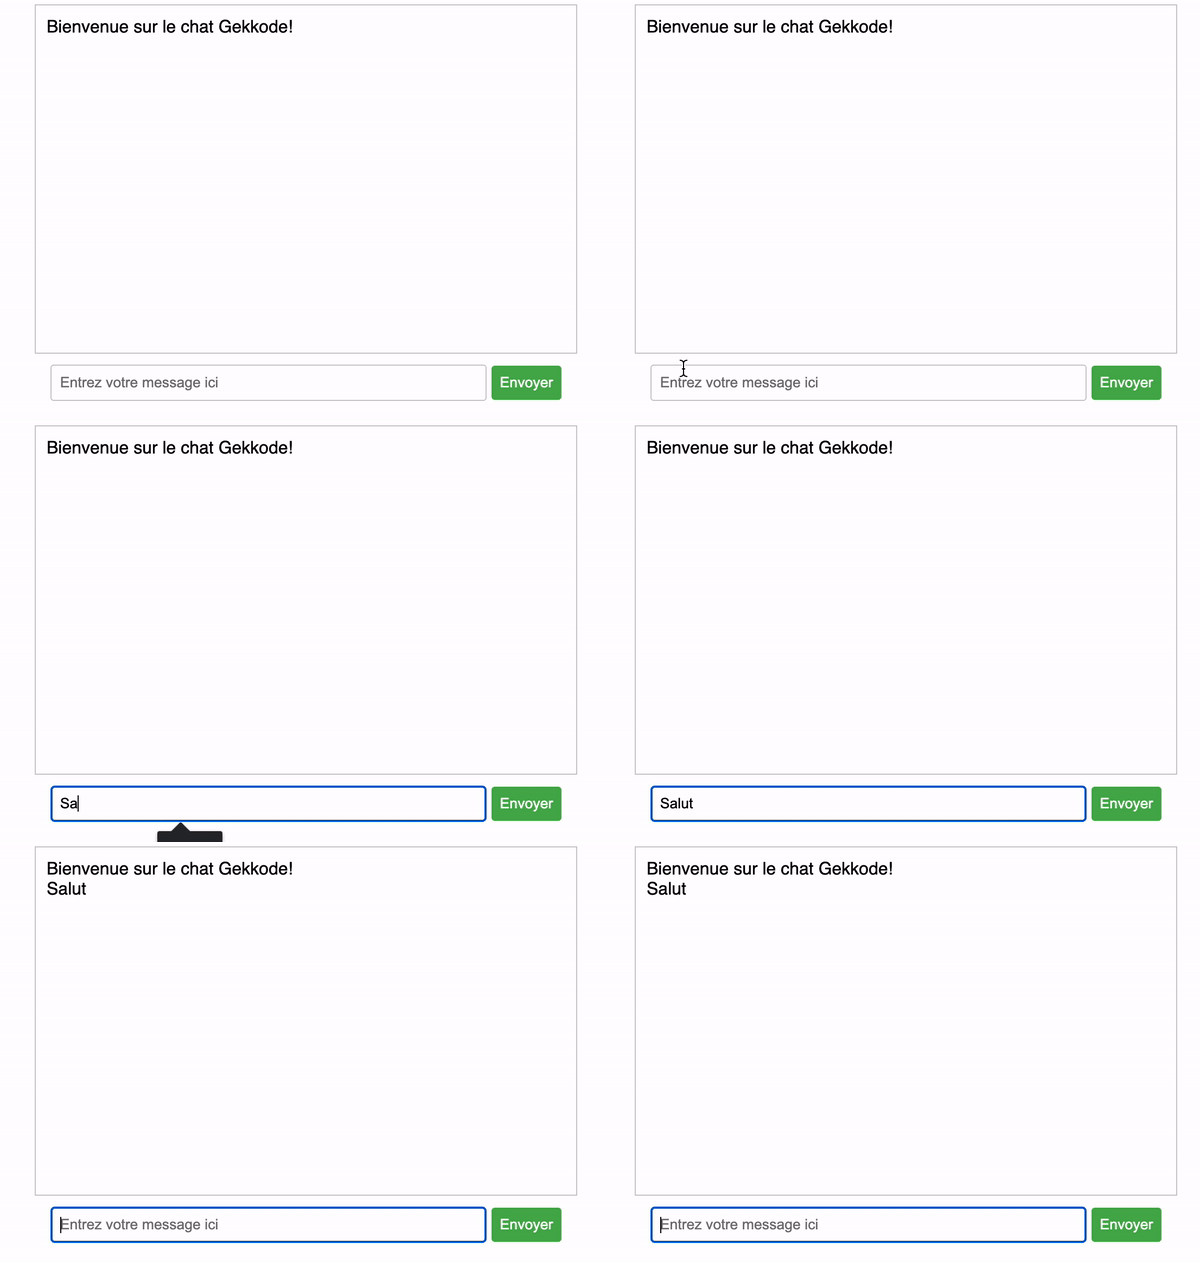
As it stands, the messages do not show up, because the Node.js server sends nothing back to the connected clients.
We have to go back to our server.js and change a few lines so that the Node.js server pushes messages to the connected clients in our online chat in JavaScript:
script.js
const WebSocket = require('ws');

const wss = new WebSocket.Server({ port: 9999 });

const clients = [];

wss.on('connection', function connection(ws) {
    clients.push(ws);

ws.on('message', function incoming(message) {
        console.log('received: %s', message);
        broadcast(String(message));
    });

ws.send('Bienvenue sur le chat Gekkode!');
});

function broadcast(message) {
    clients.forEach(function(client) {
        client.send(message);
    });
}

console.log('Server started on port 9999');You may run into a data type problem if “[object Blob]” shows up instead of the messages sent by users on the front end of your online chat in JavaScript.
Check that you really are sending text rather than Blob objects from the server. Make sure the “send” method of the WebSocket object gets a string as its argument:
ws.send(String(message));
You now have all the code of the tutorial: do not forget to run npm install to download the dependencies and to start the Node.js server.
There you have it: you now know how to receive and display the messages the user gets on the front end of an online chat in JavaScript. Feel free to follow me on the blog’s social networks if you enjoyed the article.